Rattlesnake Ledge Hike: Best Seattle Day Hike

Rattlesnake Ledge trail is one of the most popular hiking trails in Seattle and it is perfect for as a Seattle day hike for the entire family. This blog tells you everything you need to know about hiking the Rattlesnake Ledge Trail in Seattle.
Seattle is a great city to visit throughout the year and one of the biggest perks of visiting Seattle is the ability to hike around the city during the spring to fall months. One of the things I looked forward to the most while visiting Seattle for a long weekend was to find some great day hikes in the area.
Google search showed us a few different hikes that are not too far from Seattle (since we didn’t have time to drive up to North Cascades or Olympic National Park). Since I visited in April, some of the hikes I wanted to do was closed, but I am glad we were able to find the Rattlesnake Ledge trail not too far from Seattle city center.
This blog contains occasional affiliate links, where I receive a small commission on sales of the products/hotels that are linked at no additional cost to you. In addition, as an Amazon Associate, I earn from qualifying purchases. The commission I receive helps me to pay for the cost of running and maintaining this blog. Thank you for supporting my blog.
Brief Overview of the Rattlesnake Ledge Trail
Length of Rattlesnake Ledge hike: 1.9 mile each way
Time: ~2 hours round trip
Elevation gain: ~1200 ft elevation gain
Level of Difficulty: Easy/ Moderate
Dogs: Allowed on a leash
Family Friendly: Yes! Tons of people with small children on the trail
The Rattlesnake Ledge hike is a well maintained, easy and family friendly hike that takes about 2 hour round trip. It’s a easy half day trip from downtown Seattle (even closer if you live in Bellevue)!
How to Get to Rattlesnake Ledge Hike from Seattle
The Rattlesnake Ledge trail head is about a 40 minute drive (35 miles) from downtown Seattle. Google map can give you pretty detailed direction if you search for “Rattlesnake Ledge Trailhead”.
Basically to reach the trail head you will need to take I-90 East and exit at Exit 32 (436th Avenue SE). You will then need to take a right off of the exit, heading south on 436th Ave SE. This road becomes Cedar Falls Road. After a few minutes you will see the signs posted for Rattlesnake Lake and that is your destination.

Parking at Rattlesnake Ledge Trail head
There are 2 parking lots near Rattlesnake Lake but be aware that the parking lot may be full on the weekend during peak season since it is an easy and popular hike. I would suggest you either arrive early or later in the afternoon to avoid the crowd to do the hike on a weekday.
When the parking lots are full, many people end up parking on the road within the white lines (to avoid tickets). You don’t need a discovery pass to park your car at Rattlesnake Ledge since it is not a state park.
From the parking lot you will see a sign that says it is a 0.3 mile walk to the actual trail head (and bathrooms). You can also explore around Rattlesnake Lake if you have time.


There are porta-potties and information with hiking maps and the history of the area at the start of the hike.

Hiking Rattlesnake Ledge Trail
You will start the official trail near the bathrooms and the beginning of the trail is pretty wide and shaded. You will also see a lot of families and people with dogs going up and down the trail since it is a short trail.

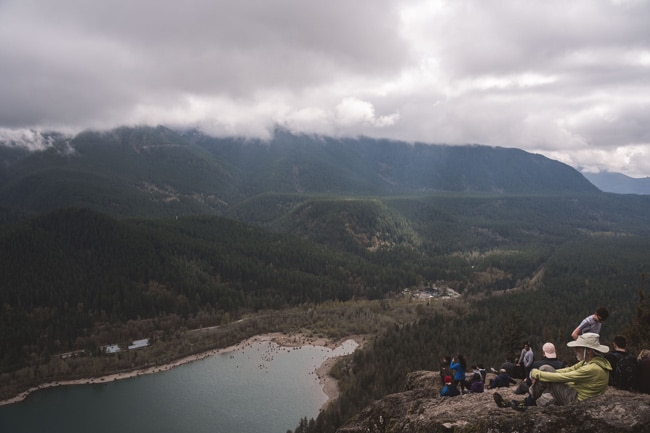
You will be able to see the top of the summit right at the bottom of the trail and the Rattlesnake Lake you are seeing now will be viewed from above as well from a different perspective!

As you start hiking up the well maintained trail, you will see many moss covered trees, branches and rocks. Actually within 10 minutes of hiking you will see a large boulder covered in moss. The nice part of hiking the Rattlesnake trail is that most of the trail is in a beautiful forest so you are sheltered from the sun and wind.

As you follow the trail up, the path gradually gets more narrow and becomes switchbacks but still can fit 2 people side by side. The trail hugs one side of the mountain and as you hike up you will starting to see some views (but honestly mostly blocked by the trees).


The hike up is moderately steep but still not too bad since young children can do it too. This is just to set your expectations since there are switchbacks along the trail and it is not a flat walk.

When you are near the top, you will see a junction and a sign (the sign doesn’t say anything about the ledge). Just head right about a few minutes to the ledge, which is the stop for most of the visitors. But be aware the ledge are on big rocky boulders with a sheer drop so use caution when you explore the ledge. There have been accidents reported where people accidentally slipped off especially during the colder months due to slippery conditions.

From the ledge you will be able to have a nice view of Rattlesnake Lake, the North Bend, Cedar River watershed, Mount Si, etc. But do try to go on a sunny/ clear day as it was cloudy when I went so I couldn’t see as much as I would on a clear day.


If you want to continue hiking, you can go back to the junction and hike towards East Peak which is about 2.4 miles away and the Snoqualmie Point is about 8.3 miles away. We didn’t venture there since we didn’t have time.
Overall the Rattlesnake Hike is pretty easy and beautiful and worth a half day trip from Seattle. If you are visiting Seattle for the first time or for a weekend, check out my 1 day to 2 day Seattle itinerary to see the best things to do in Seattle!

Like this post? Pin it!

