Hiking the Skyline Trail Loop in Mt. Rainier: All You Need to Know

Skyline Trail Loop is the best hike in Mt. Rainier National Park. This guide will tell you everything you need to know to hike the Skyline Trail Loop
<Updated 2024: You need a timed entry reservation to enter Paradise between May 24 through Sep 2, from 7am to 3pm. You need a separate timed entry reservation for Sunrise Corridor from July 3 to Sep 2.>
Mt. Rainier has so many amazing hikes, but Skyline Trail Loops is considered the best hike in Mt. Rainier. If you only have time to do one hike, Skyline Trail to Panorama Point is the hike you have to do.
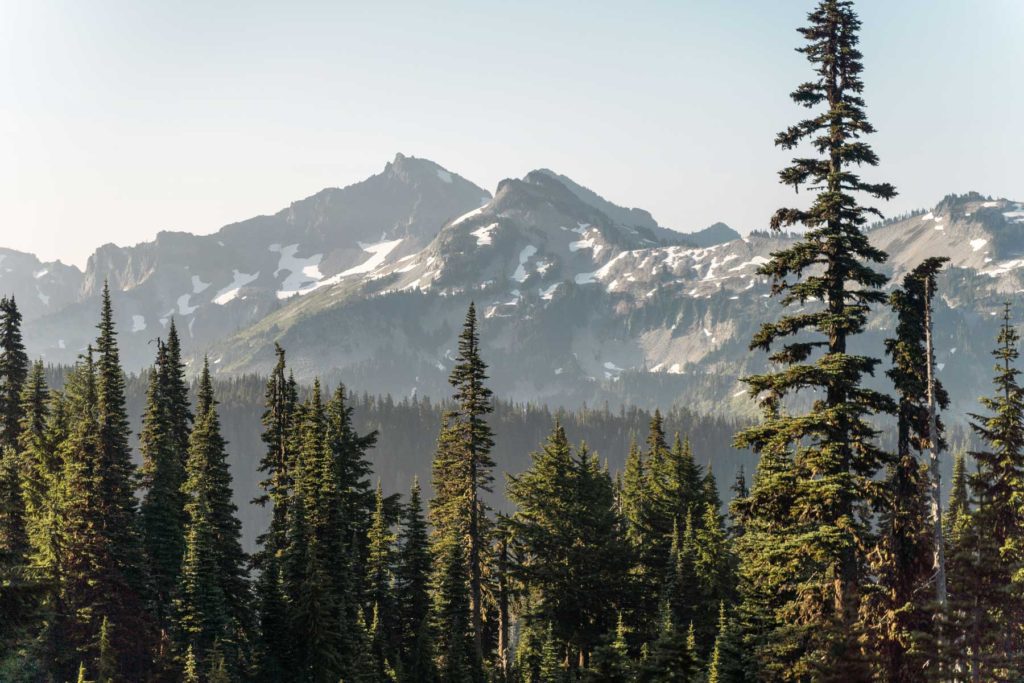
The reason this hike is so popular is because you get a taste of everything on this hike: wildflower meadows, amazing view of Mt. Rainier, glaciers, towering peaks of the Cascade Range, and a waterfall. This trail is not super strenuous and your effort definitely pays off!
This blog contains occasional affiliate links, where I receive a small commission on sales of the products/hotels that are linked at no additional cost to you. In addition, as an Amazon Associate, I earn from qualifying purchases.

Skyline Trail Loop General information
Hiking Time: 4-5 hours
Hiking Distance: 5.5 miles loop
Elevation Gain: 1700 ft
Difficulty: Moderate
Pass Needed: Mt. Rainier National Park entrance pass or an America the Beautiful pass + timed reservation for the summer
Parking Lot: Yes, at Paradise Visitor Center + Overflow Parking Lot
Roadside Parking: Yes
Bathroom: Yes, at trailhead and at Panorama Point
Best Time to Hike Skyline Trail Loop: Early morning or late afternoon July to October, when the road is open (check road status here)

How to get to Skyline Trail at Mount Rainier National Park
Skyline Trail Loop is located in Paradise in Mt. Rainier National Park, about a two and half hour drive from Seattle. Paradise is one of the 5 areas of Mt. Rainier National Park and it’s in the south side of the park.
Google Map will have a precise direction for you to get to the trailhead, but make a mental note that the road may be closed due to snow unless you visit in the summer or early fall.
Unlike Tolmie Peak Trail which had miles of unpaved road, the road to Skyline Trail is very well maintained and smooth, so you can drive any car and won’t have to worry about potholes or anything like that.
Parking at Skyline Trail
The trailhead is located in the Paradise Visitor Center parking lot.
The Paradise Visitor Center parking lot is huge, but during peak summer months the lot can be filled up quite early. We hiked Skyline Trail Loop on a Saturday in late July, and the parking lot was full around 7am.
There is an overflow parking lot 0.2 miles away, which I assume would get full pretty fast as well. So if you want to hike Skyline Trail, you should aim to get there before 7am on a weekend or go in the afternoon when people are leaving.
You can also park on the side of the road, but when we were on top of the trail and looking down at the visitor center around 11am, we could see miles of cars parked along the road (eeek!!). Unless you want to walk a mile or more to the trail, definitely aim to get there early.
There are a number of trailheads that starts around the Paradise Visitor Center, but Skyline Trail Loop would be marked very clearly so you cannot get lost.
Details of Hiking the Skyline Trail Loop
Since Skyline Trail is a loop, you can either hike clockwise or counter clockwise. If you decide to go counter clockwise, you will follow the sign to Myrtle Falls and hike 1 mile uphill to the falls first before continuing the rest of the Skyline Trail.
Most people on the Skyline trail end up going counter clockwise. Hiking Skyline Trail Loop in the counter clockwise direction is a lot steeper but the steep part is also shorter (by at least a mile if not more). If you want to get the steep part out of the way fast, you should do the trail counter clockwise. Clockwise will have a much longer but more moderate uphill, so it is entirely up to you.
Also note that you should hike this trail early in the morning or later in the afternoon as most of the trail is exposed, making it very hot and crowded to hike during the day.

We decided to do the Skyline Trail Loop clockwise, so we hit the really steep part first. The trail starts off very wide and gentle, with a nice paved road. However, this nicely paved trail quickly gets VERY STEEP very soon, everyone will be huffing and puffing as they go up this steep part for about half a mile.
But the good thing is as you go uphill, you can already see Mt. Rainier right in front of you. If you take a break and look back, you will see some nice view of the Cascade Range. At this point the trail started to get really busy with groups of people passing us (and it was only 8am!)

As you hike up this steep hill, you will see signs for other trails, such as the Alta Vista Summit and Dead Horse Creek Trail. We didn’t take a detour on those trails but the Dead Horse Creek Trail will eventually meet with Skyline Trail.
Once you get to the top of the steep hill, you will come to an open view of Mt. Rainier. Take a breather here and enjoy the view before the paved trail ends (the rest of the hike is unpaved).

You will continue to follow the unpaved trail uphill, but this time the uphill is not as brutal as the earlier part. It is a more moderate uphill and some stone steps occasionally. There are a lot of marmots on the Skyline Trail and they do not seem to be afraid of people at all.


When we hiked Skyline Trail Loop in late July, there was still a bit of snow on the trail but it wasn’t too bad. After a while you will see a sign for Glacier Point (I totally thought this was the Panorama point at first since the view was so nice, but little did I know….)


Since we had thought this was the famous Panorama Point, we thought we would be going downhill from here. But we kept going uphill, sometimes steep, so we realized this was not Panorama point at all and that we still had almost a mile of uphill to go before reaching the actual Panorama Point.
As you continue the hike, you will come across another larger snow patch. After the snow patch the trail starts to go uphill along the ledge and Mt. Rainier will be behind you now.


After seemingly forever you will finally reach Panorama Point (hooray!) There is a bathroom at Panorama Point but it is not as well maintained as the one down in the parking lot. Make sure to bring your own toilet paper and hand sanitizer if you plan to use the bathroom at Panorama Point.
The Panorama Point had an even better (and more open) view of Mt. Rainier and the surrounding peaks than at Glacier Point. Most people take a snack or lunch break here before continuing on. More likely than not, marmots will join you for your lunch break as well.


After Panorama Point, you will continue to go uphill (I thought we were gonna start going downhill from Panorama Point but I was wrong). There are some steep climb until the peak before you start going downhill.

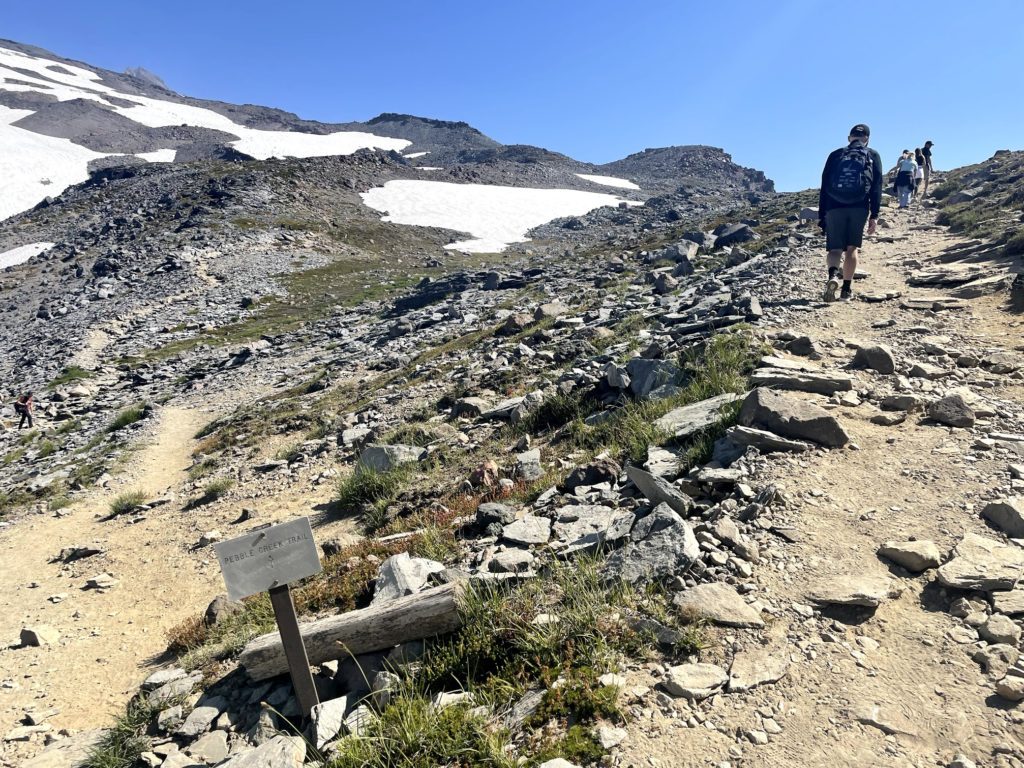
At the peak of Skyline Trail Loop you will see a sign for Pebble Creek Trail, stay on the right and continue Skyline Trail. The downhill trail is along the ledge still and it is about a mile down very rocky pavement before it finally becomes flatter and easier to walk on.
Once the steep rocky part of the trail is over, you will see a sign for Golden Gate Trail and Skyline Trail. We decided to go on the Golden Gate Trail as it was only 1.5 miles to the visitor center, but eventually the two trails will merge so it really doesn’t matter which trail you pick. However if you take the Skyline Trail (which is longer), you will see Sluiskin Falls along the way.
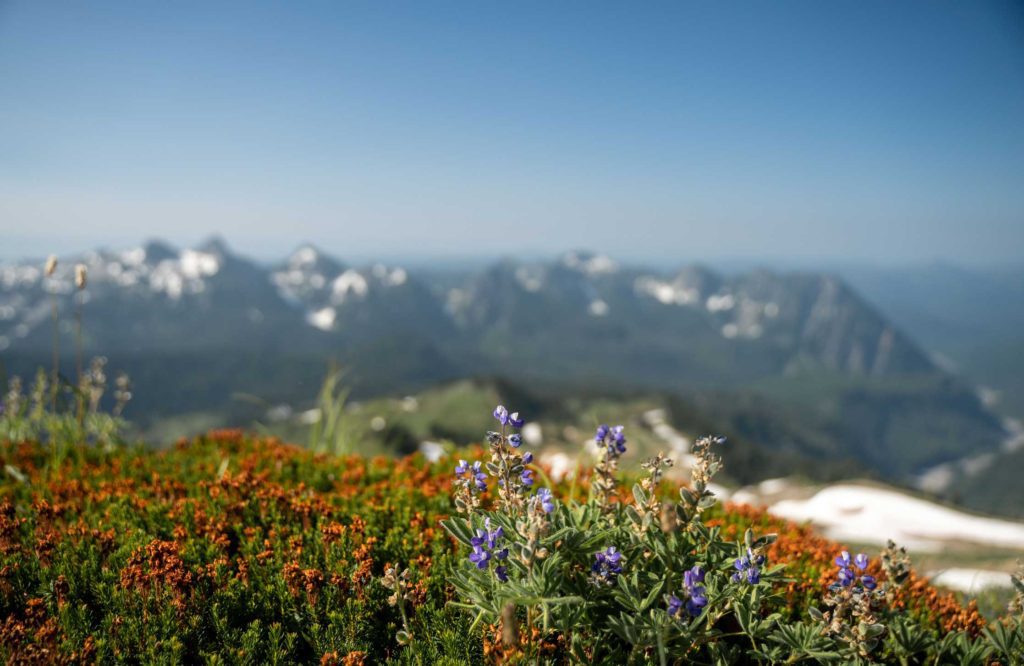
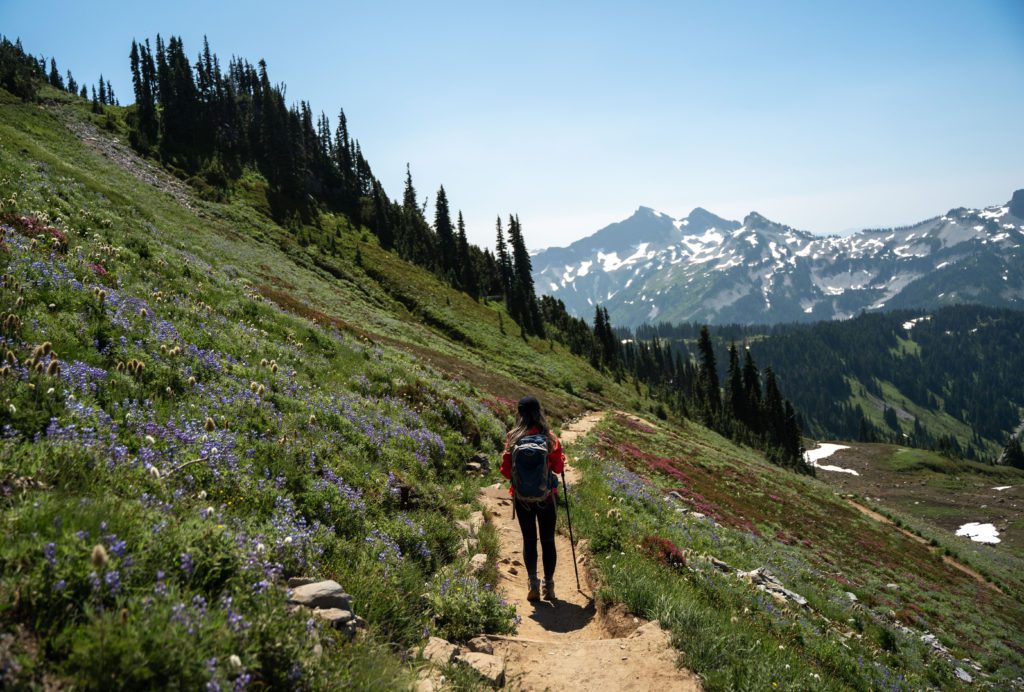
The Golden Gate Trail has a few switchbacks (but since you will be hiking down it really doesn’t matter). I was very happy we chose to hike down the Golden Gate Trail because there was so much wildflowers! It was such a pretty trail to hike down and it was very relaxing.


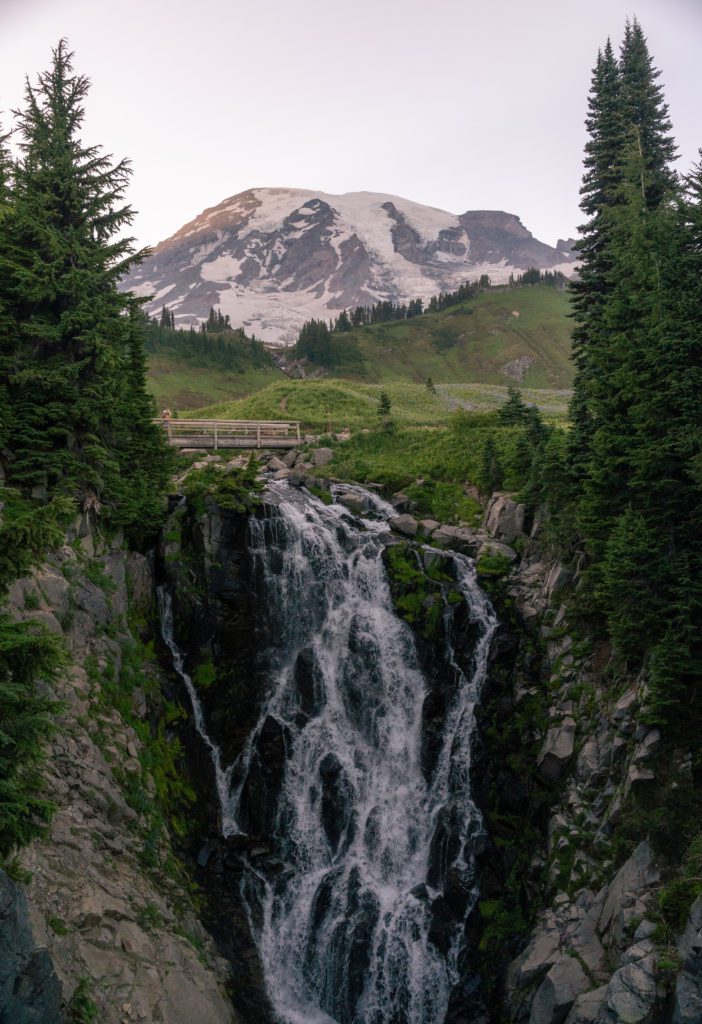
You will continue to hike down the gradual downhill slope until you reach Myrtle Falls, and the trail will once again become wide and paved. From Myrtle Falls it is about another 0.5 miles to Paradise Inn. Note that Myrtle Falls can be quite crowded during the day since it is a very family friendly destination, so there are a lot of people and kids on the small bridge.
What to Bring On the Skyline Trail Loop at Mt. Rainier
Water and snack: I would suggest at least 1.5 – 2 liters of water on the Skyline Trail Loop hike. I generally use a hiking backpack with a hydration pouch making it a lot easier to drink.
Sunscreen, hat, sunglasses: The Skyline Trail Loop is very exposed and it can be very sunny and hot during the day in the summer. Since there aren’t that many bugs on this trail, you can definitely wear short sleeve and shorts during the hike.
Hiking Shoes: You don’t NEED hiking shoes to hike Skyline Trail Loop but since you will be walking on snow patch, it is better to wear hiking shoes or shoes with good traction.
Hiking Poles I would recommend using hiking poles on the Skyline Trail Loop since it can be steep and rocky. Most of the other hikers I saw on the Skyline Trail had poles with them also.
Camera: any camera or iPhone would do!
Park Pass & Timed Reservation: you won’t be able to get into the park (and to Paradise) without these
Where to Stay in Mt. Rainier National Park
The closet accommodation to Skyline Trail Loop is Paradise Inn, one of the two lodges inside Mt. Rainier National Park.
We decided to stay at Paradise Inn because it was a few steps away from the Skyline Trail head, so we didn’t need to worry about parking and could start the hike a little later. If you want to stay at Paradise Inn you would have to book months in advance because it gets sold out quickly.
If you cannot stay at Paradise Inn, another good option is the National Park Inn, which is a 20 minute drive. This is probably the second closest option to Skyline Trail Loop unless you are camping. For more information on camping, see here.
If you cannot stay inside Mt. Rainier National Park, the closest town to Paradise is Ashford. Most visitors end up staying in Ashford since it has a few lodges and restaurants. A few good places to consider include Alexander’s Lodge and Nisqually Lodge.
Is Skyline Trail Loop worth it?
Skyline Trail Loop is the best hike at Paradise in Mt Rainier. The hike offers sweeping views of Mount Rainier up close, beautiful wild flowers, waterfalls and views of glacier. The hike is not too difficult and it really is offers the best views of Mt. Rainier.
So yes, Skyline Trail is totally worth the effort. If you can only do one hike in Mount Rainier Skyline Trail is the hike!
Read My Other Mount Rainier Blogs:
The Best Hikes in Mount Rainier National Park
Mt. Fremont Fire Lookout Trail: What you need to know
Hiking Tolmie Peak: All you need to know
How to Spend 1 day in Mount Rainier for Hikers and Non-Hikers
3 to 4 days in Mount Rainier in the summer
Like this post? Save this Skyline Trail Loop hiking guide to Pinterest!